Chad Lundquist/Nevada Appeal
Microwave ovens are handy things, especially for those of us of the bachelor persuasion. But there's a problem, especially in an older home: counter space.
Yes, you can hang the Zapper from a cabinet or over the stove in some cases, but not in my bachelor pad. So when my niece eyed my kitchen and said, "Why don't you cut a hole in the wall and stick the microwave out into the garage." I said it was a fine idea.
And it was. Problem was that I had no idea of how to do such a thing. Obviously, there was a wall to cut through, which meant studs in the way. And the problem of electricity: How to get it from the garage to the micro.
Clearly, this was a problem beyond my journalistic skills, so I turned conveniently to my niece's husband, David Ritterhouse, who just happened to be skilled at everything dealing with homes. Piece of cake, he said dismissively. And six months later the job was done. How? A lot of checking, measuring, mulling it over. Then ... read on.
First: Measure the microwave, look at the wall. Measure twice, thump the wall three times.
Second: Come to the conclusion that just sticking it through the wall was not enough.
Third: Build a sturdy wooden box to enclose the microwave. This required plywood, electrical connectors and putting it all together.
Fourth: Actually build the box. This required designing the box, assembling it, attaching the electrical source and lugging it from South Lake Tahoe to Carson City.
Fifth: Cut a hole in the wall. Studs had to be located, sheet rock cut out, studs removed. Much dirt and mess involved and the carpet sweeper was plugged up with a year's dirt.
Sixth: Slide the box into the wall. Since David is a master of measure twice and cut once, the box fit into the wall perfectly. An angle iron support was added at the bottom.
Seventh: Connect the microwave to a power source. Easy for a pro. He snaked it through the insulation in the wall to an existing electrical outlet.
Eighth: Add foam around the microwave and the box. Done.
Well, that left adding the trim around the microwave. Couldn't just have it sticking in the wall naked. But David had other jobs to do, so that task fell on the homeowner. Said homeowner isn't exactly adept with tools, but with a powered miter saw in the garage, it couldn't be too hard.
Ha!
First, the molding stock had a raised edge, which the homeowner didn't notice until he had sawed all four sides. Well, only two were wrong, which required more stock. Then measuring and fitting together became a problem. Holding the first piece in place while juggling a level to keep things in kilter and driving in nails proved to require skills and dexterity of a superior level. Duct tape helped, however.
The cuts were easy; making the angles just right - not.
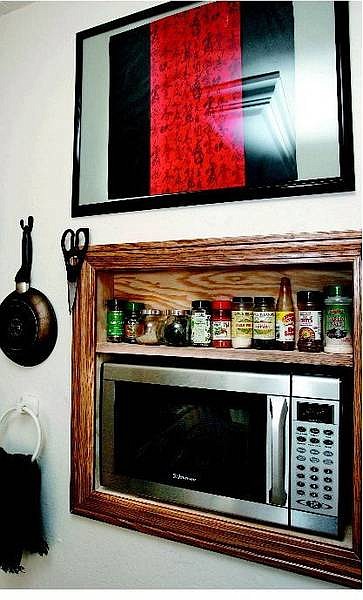
But finally, the molding was in place, the new counter space already taken up by items that mysteriously appeared out of nowhere. If you don't look too closely at the miter joints, it all looks fine - from a distance. And there's even a shelf for spices above the microwave.
Just $30 for materials and a free dinner for David and his wife and my niece, Robin and I've almost got enough counter space. Except, where do I put the champagne glasses?
n Contact Sam Bauman at sbauman@nevadaappeal.com or 881-1236.

Comments
Use the comment form below to begin a discussion about this content.
Sign in to comment